Fall Leaves Rice Krispie Treats-Easy Autumn Dessert
Fall Leaves Rice Krispie Treats are more than just a sweet snack; they’re a vibrant edible embodiment of autumn’s magic. As the crisp air descends and the world outside transforms into a kaleidoscope of fiery reds, warm oranges, and rich yellows, what better way to capture that cozy, comforting feeling than with a treat that mirrors nature’s breathtaking spectacle? We all have a soft spot for classic Rice Krispie treats – that irresistible chewy texture, the sweet, buttery marshmallow goodness that transports us back to childhood. But these Fall Leaves Rice Krispie Treats elevate that nostalgic favorite to a whole new level of festive fun.
Why you’ll adore these
What makes these Fall Leaves Rice Krispie Treats so special is their delightful visual appeal and the subtle, yet delightful, seasonal twist. They’re incredibly easy to make, making them perfect for a fun family activity or a quick dessert to impress guests. Imagine the delighted squeals of children as they bite into these beautiful, leaf-shaped creations, or the appreciative smiles of friends at your next autumn gathering. These aren’t just simple squares; they’re handcrafted bursts of fall joy, perfect for celebrating the season.
Fall Leaves Rice Krispie Treats
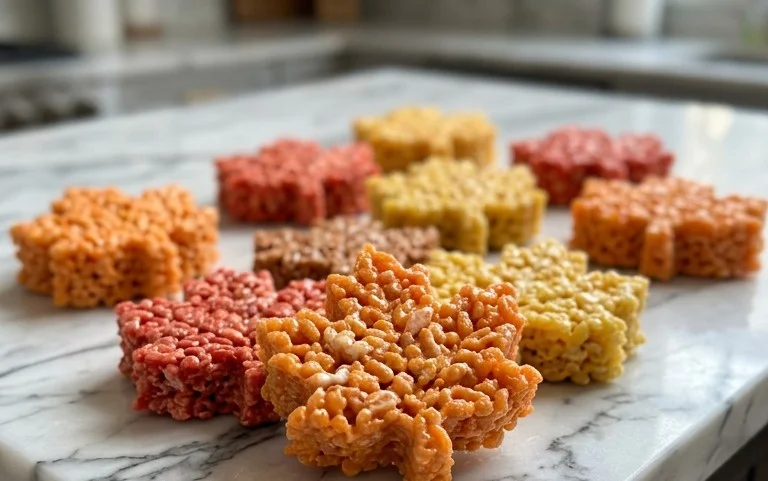
As the crisp air of autumn arrives, so does the desire for cozy treats and the vibrant beauty of falling leaves. What better way to capture the essence of the season than by transforming a beloved classic into a festive fall masterpiece? These Fall Leaves Rice Krispie Treats are not only incredibly easy to make, but they also offer a delightful visual appeal that will charm both kids and adults alike. Forget the plain old squares; we’re diving into a world of color and autumnal shapes that are perfect for Halloween parties, Thanksgiving gatherings, or simply a fun afternoon project.
Imagine the joy on your little ones’ faces as they help you mold and cut these cheerful treats into iconic fall shapes. The subtle sweetness of the marshmallows, the satisfying crunch of the Rice Krispies, and the vibrant hues of red, orange, and yellow will evoke the magic of a walk through a park ablaze with autumn foliage. This recipe is a fantastic way to bring the outdoors in and celebrate the most colorful season of the year. Plus, it’s a wonderfully forgiving recipe, perfect for bakers of all skill levels.
The beauty of this recipe lies in its simplicity and its adaptability. While we’re focusing on fall leaves, the same technique can be used to create any shape imaginable. Think pumpkins, acorns, or even your favorite character! The key is the excellent quality of the ingredients and a little bit of patience during the cutting process. So, gather your ingredients, put on some cozy fall music, and let’s get ready to create some edible autumn art!
Ingredients:
Crafting Your Autumnal Delights
This is where the magic happens! We’ll be creating the base mixture, coloring it, and then transforming it into festive fall shapes. Don’t worry about perfection; the rustic charm of homemade treats is part of their appeal.
Once cooled, these beautiful fall leaves are ready to be enjoyed! Arrange them on a platter for a stunning centerpiece that tastes as good as it looks. Happy fall baking!
Conclusion:
These Fall Leaves Rice Krispie Treats are a truly delightful way to celebrate the cozy flavors and vibrant colors of autumn. They’re incredibly easy to make, making them a perfect activity for families or a quick treat to whip up for a gathering. The classic crispy, chewy texture is elevated with the warm spices and the charming leaf shapes. They bring such a festive touch to any fall table!
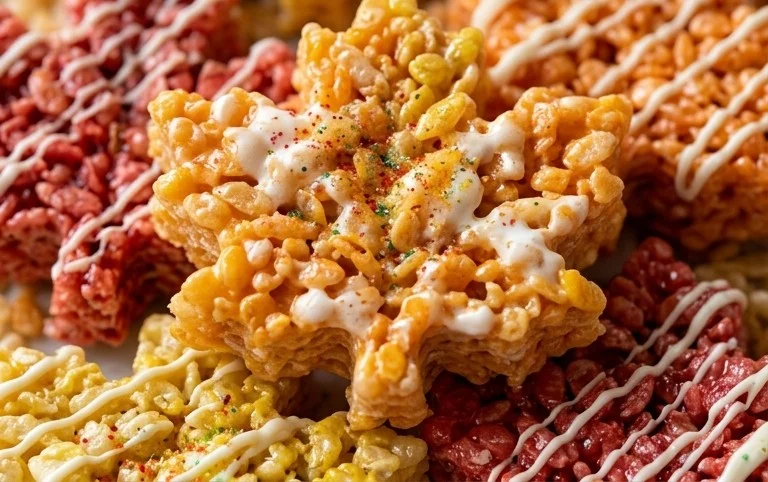
When it comes to serving, these treats are wonderfully versatile. They’re fantastic on their own, but you can also arrange them on a platter for a holiday party or pack them in lunchboxes for a special surprise. For variations, don’t hesitate to experiment! Try adding a pinch of nutmeg or ginger along with the cinnamon for an extra layer of spice. You could also drizzle them with white chocolate or a caramel sauce for added richness, or even mix in some chopped pecans for a delightful crunch. I genuinely encourage you to give this Fall Leaves Rice Krispie Treats recipe a try; I know you’ll love them as much as I do!
Frequently Asked Questions:
Q: Can I make these Fall Leaves Rice Krispie Treats ahead of time?
A: Absolutely! These treats hold up very well. You can make them a day or two in advance and store them in an airtight container at room temperature. They’ll remain perfectly chewy and delicious.
Q: How can I get crispier edges on my Rice Krispie treats?
A: To achieve crispier edges, after pressing the mixture into your pan, you can try a few things. Ensure your butter and marshmallows are fully melted and combined. Press the mixture firmly into the pan, and consider letting them set in the refrigerator for about 15-20 minutes before cutting. This helps them firm up.
Fall Leaves Rice Krispie Treats
Festive and fun Rice Krispie treats shaped like fall leaves, perfect for autumn gatherings.
Ingredients
-
12 cups Rice Krispies Cereal
-
12 cups Mini Marshmallows
-
12 tablespoons Butter (Sweet Cream, Salted)
-
Wilton Color Right Food Coloring (Autumn colors: orange, red, yellow, brown)
-
Cooking spray or butter for greasing
Instructions
-
Step 1
Grease a 9×13 inch baking pan and a spatula with cooking spray or butter. -
Step 2
In a large saucepan, melt the 12 tablespoons of butter over low heat. -
Step 3
Add the 12 cups of mini marshmallows and stir until completely melted and smooth. Remove from heat. -
Step 4
Add a few drops of Wilton Color Right Food Coloring (e.g., orange, red, yellow, brown) to the marshmallow mixture and stir until evenly colored. You can create multiple batches with different colors. -
Step 5
Add the 12 cups of Rice Krispies Cereal to the colored marshmallow mixture and stir until well coated. -
Step 6
Working quickly, spread the mixture into the prepared baking pan using the greased spatula. Press down gently to create an even layer. -
Step 7
Allow the treats to cool for about 10-15 minutes until firm enough to handle. Use a leaf-shaped cookie cutter to cut out the shapes. If the mixture sticks to the cutter, re-grease it.
Important Information
Nutrition Facts (Per Serving)
It is important to consider this information as approximate and not to use it as definitive health advice.
Allergy Information
Please check ingredients for potential allergens and consult a health professional if in doubt.